Radial Blur:
 I used radial blurs to simulate spinning, in my opening shot I had the TIE Interceptor spinning out of control, using the radial blur on the star layer made them create streaks so that they looked like they were moving really fast. Also this pays homage to Star Wars films when they travel at light speed
Gaussian Blur:

Fast Blur:

Glow:


Vignette:
To create my vignettes I used created black solids and the created masks to the look through and feathered the edges. I feel the vignettes really help in 2 ways: 1. it focuses the audiences attention towards the middle of the shot as the corner are fading to black, therefore nothing interesting to see. and 2. I feel it makes the image of the shot much more professional looking, it brings down the edges of the shot as if they naturally fade.

I used the strobe light at the start of the animation to symbolise a warning alarm, coloured it red, which is known as an emergency colour when used in such an instance.

Brightness and Contrast:
Using brightness and contrast, I could give the shot a stronger presence of blacks and whites, already enhanced through using ambient occlusion renders, so the contrast could help give stronger blacks and whites. The brightness was used to either bring up the overall brightness, or darken it depending on the shot.
In this particular shot, using the brightness and contrast it makes the red buttons really pop.
Masking:
 I have used quite a lot of masks in After Effects, they range from splitting images so that I can create focal blurs, to direct the audiences' attention. In one shot (shot 5) I made a mask to isolate the planet from the stars so that I could create a parallax effect, so that the movement was more realistic in simulating the stars being light years away and the planet a few thousand kilometres away.
Using the lens flare I could really make the look of the sun peaking over the planet really come to life, as when the TIE interceptor reveals the flare, due to camera movement, I feel it really completes the shot.
 Simulated Reflections:
With the help of masking I could enhance the reflections of any glass I had in the shots, I felt this necessary as I had the reflections rendered from 3ds Max, such as the tips of the wings of the TIE Interceptor being reflected in the windscreen. To then enhance this I added the reflections of the stars onto the glass.
Adjustment Layers:
A lot of my adjustment layers held the brightness and contrast for the shots or the effects to blur particular objects in the scene. Using the adjustment later was really good because anything below them in the hierarchy would be effected, so I didn't need to spend time putting the same effect on various layers, and having to match settings so that they all match.

Precomposed Layers:
Using Precomposed layers made the reflecting of the stars in the first red circle a lot easier. When I originally tried, using 2 layers of stars, trying to match the speed of 2 different timed layers didn't give me the effect I desired. To combat this I precomposed the star layer, and then this way any keyframes made in the precomposed layer stayed as they were so I all I had to do was to create the mask on the 2nd red ellipse follow the shape of the windscreen. I felt this necessary due to the wings being reflected on the windscreen, therefore I saw it fit to reflect the stars, especially as the windscreen is quite a large element in the shot.
Time Remapping:

To create the ramping effect of this shot, I used time remapping on the precomposed layers (X, X_AO, TIE, and TIE_Ao) so that I could create the slow motion effect. In the first screen, the time frame where the timer is, is 1 second for 1 second, where as the second frame, each second on the timer accounts for 2 to 3 seconds, so that time is increased. Using time remapping makes the motion seem much faster when full speed, and that makes the slow motion have more of an impact.
Shape Layers:
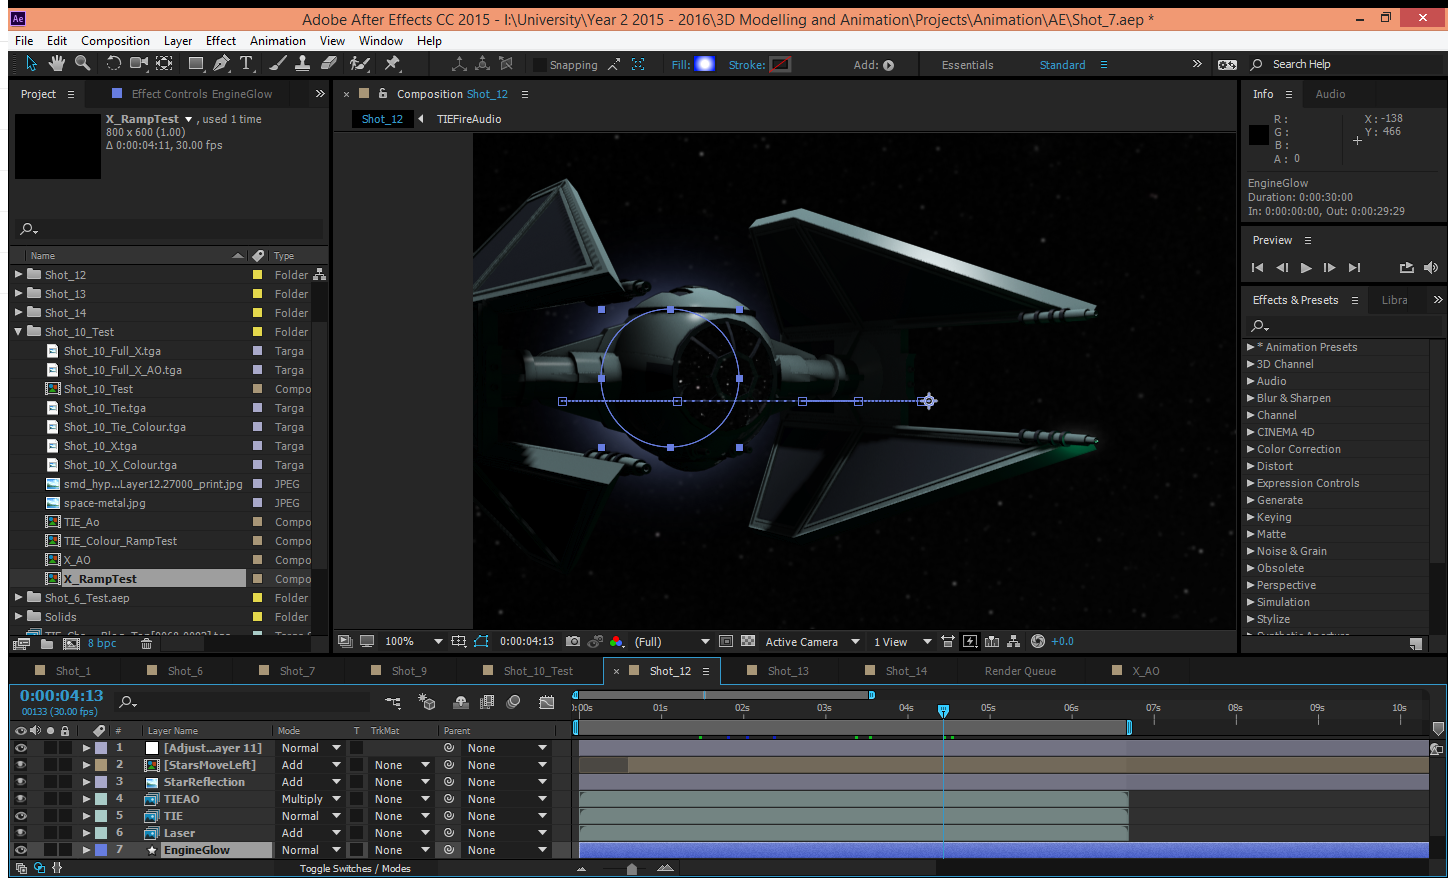
To create the engine glow of the TIE Interceptor I create a shape layer. I used a blue ellipse and added a glow effect so that it would simulate the blue engine glow. I used the shape layer so that it is a quick simple solution with an effective and clean result.
This shot is one of my favourite shots due to how clean it comes across with the faint engine glow, and the ambient occlusion.
References:
[Hyperspace Falcon] 2013. [image online] Available at: <http://vignette3.wikia.nocookie.net/starwars/images/a/ae/Hyperspace_falcon.png/revision/latest?cb=20130312014242> [Accessed 16 December 2015]
No comments:
Post a Comment