Thursday, 29 October 2015

TIE Cockpit Progress


The cockpit is taking shape now.  The console is filling the space better, now with pedals below.  So much extruding for the console shape, I want to give quite a claustrophobic feeling, but also functional, everything within arms reach.

I'm happy with how it's turning out, there are no glaring errors jumping out at me.

Tuesday, 27 October 2015

TIE Cockpit Model


Here are the beginnings of my TIE cockpit!  The octagons are to show the back and windscreen of the TIE.  I'm pleased with how my console is turning out, but it needs more buttons, screens, and dials, so that it looks more high tech and space-like!  Also, the chair will be remade, I showed a friend and they weren't overly impressed with the Empire's funding...using cheap, unstable chairs...

Lathe Joysticks

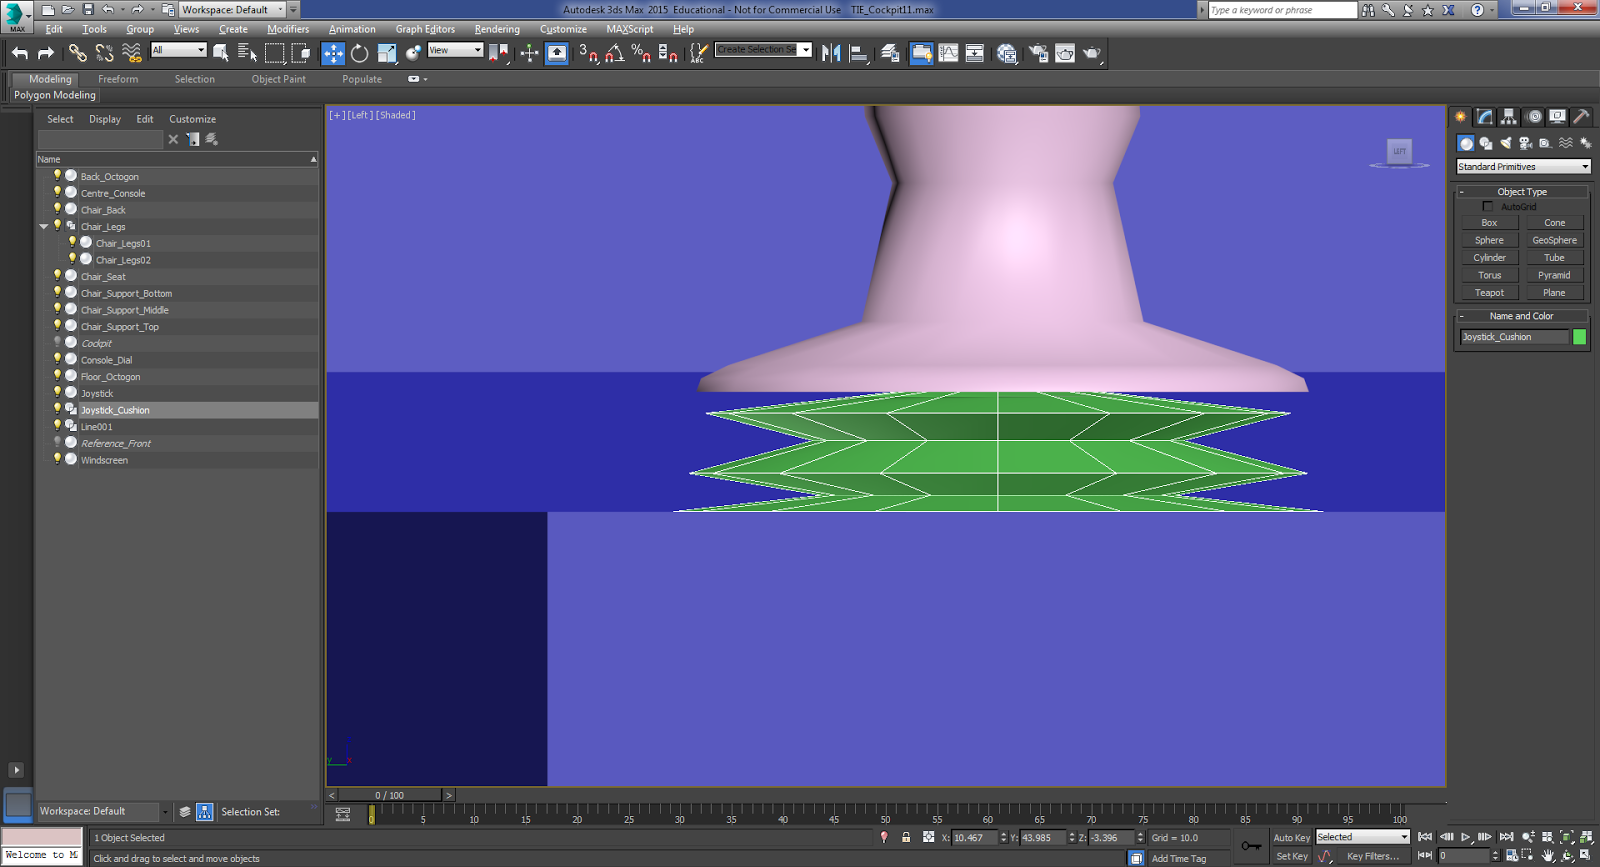
Using the lathe tool, I created the rubber aspect beneath the joystick.

By drawing a spline and then revolving, moving the revolved polygons to the edge, otherwise I had an hour glass looking shape.

Making them this way is far quicker than if I were to try using cylinders, setting the height segments to 6 and the grabbing the vertices and bring them in, then out, then in etc.  Plus I've learned a new technique using lathe!

TIE Cockpit


For my 3rd model I have decided to create an interior of a TIE Interceptor cockpit.

Through my research I have not found many views of the TIE interior.  After discussing with my lecturer, it has been decided that I can create my own interpretation of what a TIE interior may look like.

I have found this screenshot, which I presume is from an old game cutscene, that only shows a limited perspective of the cockpit.  I can take some information from this, but only to a slight degree.


Where as this GIF shows quite a lot more detail of the cockpit, the different screens flashing up, and as it pans slightly to the left, it shows more depth.  This give me a good basis to begin my model and try to replicate and adapt the cockpit to my own design.


References:

[cockpit tie fighter pilot] n.d. [online] Available at: <http://www.miscellaneoushi.com/Clothes/tie/cockpit_tie_fighter_pilot_1920x1440_wallpaper_22622/download_1080x960> [Accessed 27 October 2015]

[Cockpit View from a TIE Fighter] n.d. [online] Available at: <https://s-media-cache-ak0.pinimg.com/originals/44/83/ea/4483ea50d2aa34b3bacb78d1dfaff185.gif> [Accessed on 27 October 2015]

Sunday, 25 October 2015

TIE Wing Overhaul

I couldn't salvage the wings.

I have had to recreate them, and by doing so, I have made them much quicker, and much nicer than before.


The top wing is the new one, and the bottom is the old.  The shape is much nicer, and because I've made it straight, rather than at an angle, it so much easier to work with.  Extruding polygons in, out, up, or down is now a breeze.  Rather than having to move objects to the side, and then up, and then to the side again.  I know now, keep objects flat until they are complete before rotating.

Thursday, 22 October 2015

Miniature X-Wing

Having miniatures to look at, helps find all the smaller, finer details.


From the side view here, I noticed that the X-Wing has little rivets down the fuselage, something I may have missed before.  The details such as the square holes in the underside of the wings were too hard to read on the schematics I was using.  Seeing this model with the holes makes it that much easier to work out what they are.

The back view I can see the details on the rear of the X-Wing, making them much easier to create. I think the best way to make these would be to create the primitive shapes separately and then using boolean > union to make them a part of the main body.


The top view shows all the detail in between the engines on the wings much clearer to see.  Again I would create these shapes using primitives, and joining them to the main body through boolean > union.


One thing I have noticed on the front view are the little braces (I think they are) on the front of the wings' engines.  They all tilt towards the ship, so when making one I would need to rotate it and then when using the mirror tool, they should all match up and be tilted towards the main body.

Miniature TIE


To achieve the finer details I have taken some photos of a miniature TIE Fighter.

The wings here are more detailed than I had realised, I would need to inset the darker areas, and then use the connect tool to create the ridges.
 Using the edges, I can grab the edges of the thruster and create the grip looking shapes into the main body.
The front view shows the connections from the windscreen port to the main body, this could be achieved via extruding the windscreen or adding the shapes then using compound > boolean > cut > union to mold the shapes together.
To achieve the greater detail in the entrance hatch, I believe I would be able to use the boolean tool, under the compound objects, and then use the cut: union to add the shapes on top.